-
Ribs 예제 도입기 - Root편Swift/아키텍쳐 2021. 10. 15. 11:03
https://github.com/uber/RIBs/wiki
이거를 그대로 따라가면서 Root, LoggedIn 을 만들어 보자!

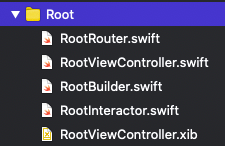
일단 구조를 확 이해할 수 있는 위 트리를 첨부합니당~ 아 예제로 이런걸 구현하는구나 한눈에 이해한뒤,.
순서대로
1. Root 를 생성한다.
2. AppDelegate에서 호출
func application(_ application: UIApplication, didFinishLaunchingWithOptions launchOptions: [UIApplication.LaunchOptionsKey: Any]?) -> Bool {
		let window = UIWindow(frame: UIScreen.main.bounds)
		self.window = window
		let launchRouter = RootBuilder(dependency: AppComponent()).build()
		self.launchRouter = launchRouter
		launchRouter.launch(from: window)
		return true
	}
아래처럼 AppComponent 작성
import RIBs

class AppComponent: Component<EmptyDependency>, RootDependency {

	init() {
		super.init(dependency: EmptyComponent())
	}
}
3. Root는 아래처럼 build에 리스너 빼고 LaunchRouting, LaunchRouter 로 수정 builder와 router 수정
final class RootRouter: LaunchRouter<RootInteractable, RootViewControllable>, RootRouting {

    // TODO: Constructor inject child builder protocols to allow building children.
    override init(interactor: RootInteractable, viewController: RootViewControllable) {
        super.init(interactor: interactor, viewController: viewController)
        interactor.router = self
    }
}

// MARK: - Builder

protocol RootBuildable: Buildable {
    func build() -> LaunchRouting
}

final class RootBuilder: Builder<RootDependency>, RootBuildable {

    override init(dependency: RootDependency) {
        super.init(dependency: dependency)
    }

    func build() -> LaunchRouting {
		_ = RootComponent(dependency: dependency)
        let viewController = RootViewController()
        let interactor = RootInteractor(presenter: viewController)
        return RootRouter(interactor: interactor, viewController: viewController)
    }
}
4. 호출 해보기 ~
: 이렇게 일단 root를 호출하는게 성공했다면 기존 예제와는 다르게 Login 부터 내가 원하는대로 살짝 바꿔서 진행할 예정이다.
위의 트리 그대로 해보고 싶다면 아래를 참고해서 진행하면 좋을 것 같다! 역시 하면서 배우기 최고!
https://github.com/uber/RIBs/tree/master/ios/tutorials
GitHub - uber/RIBs: Uber's cross-platform mobile architecture framework.
Uber's cross-platform mobile architecture framework. - GitHub - uber/RIBs: Uber's cross-platform mobile architecture framework.
github.com
728x90'Swift > 아키텍쳐' 카테고리의 다른 글
Redux Architecture (ReSwift) (0) 2021.11.18 Ribs - 로그인편 (0) 2021.10.15 Ribs 예제 도입기 - Ribs 설치 편 (0) 2021.10.15 Ribs 에 대해서... (0) 2021.09.30 Clean Architecture (0) 2021.06.18